Tuesday, July 23, 2013

The Hair Affair


I’m sure there a few people who observed the above photo and wondered what they were looking at. It’s my English Angora Rabbit, Angus. We had just started one of several recent marathon grooming sessions.

Why marathon you ask? Well, when it comes to extra fine, long hair that never seems to run out, Angora rabbits have your Yorkshire Terrier or Pomeranian beat, hands down. Almost two weeks ago, Angus started one of his quarterly sheds. To further explain, the smaller angora breeds blow their undercoats four times a year.

When I bought Angus at the beginning of May, he had recently been given his summer haircut. At first I was a little disappointed. The day I received him was the first time I saw and handled an Angora rabbit in person. I will be honest and admit that I had been dying to run my fingers through his long, angel-soft hair. He was still incredibly soft (like The Velveteen Rabbit), but he looked kind of comical. Anyone who has ever dreamed of Angora ownership has probably poured over every image they could find on the internet. To say I was a bit startled when handed a semi-naked, skinny rabbit would be an understatement. I had gotten used to the compact and slightly plumper body-type of my Lion Head Bunny.

Even though Angus was moving indoors at my house, his haircut was a blessing in disguise. I still had a month left at school before summer vacation, so except for their morning meal, bunny chores waited until I got home. With Angus’ shorter hair, he wasn’t much of a grooming chore until shortly after school got out. Then his hair started growing out with a vengeance. If he wasn’t an indoor bunny I would have sheared him then to give him relief from the heat. But having Angora wool at my fingertips had been a dream for a couple of years. I couldn’t wait any longer to have some in my possession. Plus, I was dying to see what he looked like in his full, hairy glory.

Before I brought him home, my research led me to believe that I would be more comfortable plucking or grooming out his shedding coat. Well, folks, research doesn’t prepare one for reality when it comes to Angora rabbits. First there was the occasional mat to cut out. Next to go was the hair on Angus’ back feet and legs. (It was the only solution I had due to his love-hate relationship with the litter box.) A few weeks ago his Sergeant Pepper Beetle bangs got trimmed. While the hair-covered face was terribly charming, it was getting into his eyes, literally. Plus, though he usually knew I was in the vicinity, he couldn’t see my hand and was startled when I touched him. The bangs had to go before I gave him a heart attack.

And now for those marathon grooming sessions. When the coat first started coming out, I tried to keep the combing to half-an-hour. He would get a day or two in between. Despite my best efforts to work quickly and thoroughly, the hair kept coming and the grooming sessions kept getting longer. There was no end to the loose hair coming out in my hands. One episode ended up stretching into two hours. I stood up to stretch my back. Angus took the opportunity to beg for an end to the torture. He stretched up on his back legs and put his face in mine, a clear indication he’d had enough for one day. Last week, I made the mistake of grooming him before I went to bed. I spent most of the night dreaming that I was grooming rabbits. It was a little disturbing. This weekend, I threw in the towel. I started shearing Angus yesterday. His haircut should be done in a day or two.

He takes shearing very well. In fact, I’m sure he’s quite used to it and probably wondered why I was making such a production out of harvesting his hair. Truthfully, I don’t know why I was afraid of the grooming scissors. We had two dogs for several years that required regular clipping. (The Cocker Spaniel almost rivaled Angus in the fineness and length of his hair.) Regardless of how the rabbit and I finally reached this point, the end is finally in sight. In a few weeks, I’m leaving to visit family and take my younger daughter back to college. My husband was getting worried about his ability to groom Angus with the same dedication while I’m gone. Now, that the rabbit is getting semi-naked again, I think the hubby is doing happy dances behind my back.

The Project Queen

Monday, July 15, 2013

On the Path to Yarn Independence


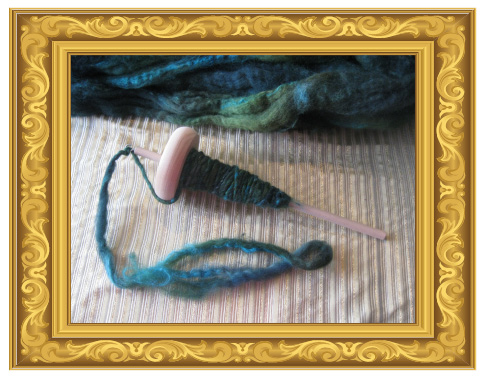
At the beginning of this month I took a beginning spinning class. It’s not the first time I’ve attempted learning this ancient skill. The lady who taught me knitting basics also tried to teach me spinning with a spindle. Knitting and spinning were something she learned from the Inca women in her community when she was a child. She was from Bolivia, and the fact that she was passing on very old traditions meant a great deal to me. My yarn-loving mentor had been honing her skills for more than fifty years. Spinning did look easy when she was doing it. Alas, the first and only spinning lesson didn’t go very well. If memory serves me correctly, I believe it was drafting the fiber that caused me the most difficulty. After 25 years, I can’t really say why I didn’t persevere with it. It might have had something to do with being brand-new to knitting. Maybe it just seemed easier to focus on one new skill at a time.

Within a year of my only spinning lesson, I got married. From that point on, I only saw my older friend occasionally. Learning to spin got put a on a back burner. (Way back) Then two years ago my dad gave me a spinning wheel he made. A few months ago I achieved the dream of owning two fiber producing cuties. It was time to make another attempt at yarn independence.

I wish I could say I took to spinning as if I’d done it all my life, but the first lesson was a little bumpier than I would have liked. That darn drafting gave me fits, again. I will say the instructor gave some very good tips for different ways to separate the fibers. I’m a firm believer that there is usually more than one way to do things. Having various options to try did help.  After some experimentation and plenty of practice, the process is starting to get a little easier. I don’t feel anywhere near ready to work with the precious bunny fiber I’ve collected so far (more on that later…), but hopefully that day will come very soon. Maybe, my older daughter will get a ball of my angora yarn in her Christmas stocking. If she’s very good.

The Project Queen

Tuesday, July 9, 2013

Tabletop Fire Pots


Since they came on the market, I liked the idea of having a tabletop fire pot. A bit of research revealed that there can be major safety issues with the gel fuel used in such pots. Some come with a metal dish that is refilled from a bottle. I don’t know exact numbers, but it seems a few people experienced serious burns while refilling the pots. Apparently, it’s not always possible to tell if the fire is out when the fuel gets low. After seeing DIY pots on Pinterest, I wanted to make my own. It gave me the opportunity to look at other fuel options.
Instead of one pot, I created two. One is mostly for ambience, while the other allows small foods, like marshmallows, to be roasted at the table.
Both pots are glazed ceramic with the drainage saucers attached. You will want something with small drainage holes so the contents of your pot don’t escape from the bottom. They’re suitable sizes for houseplants. The smaller pot uses a 2.6 oz. can of Sterno as fuel. The larger pot was designed to hold a handful of wood chips or natural charcoal in a small foil pan. The pots were filled with leftover aquarium gravel until the tops of the fire containers were level with the pot rims. (The gravel is a filler that’s not seen. It doesn’t need to be fancy.) The fuel containers were centered on the gravel. Then they were surrounded by glass decorator marbles to finish filling the pots. The sand and marbles act as insulation and keep the exterior of the ceramic pots from getting too hot.
The Sterno can in the smaller pot is not refillable. When empty, the entire can is replaced. The lid can be placed back on the can to smother any flames when the fuel gets low. Make sure to use caution, especially if there is some fuel on the bottom of the lid. (Do not use water to extinguish.) Sterno cans come with a blue dot that is supposed to indicate safe handling. If using it, make sure to read the safety instructions, and let enough time pass before handling the used can.
The marshmallow roasting pot contains 2 individual-size foil pie pans. Leave the bottom pan in the pot at all times, or the marbles will fill in the space when the used pan is removed. To use the pot, place no more than a handful or two of wood chips in the foil pan. Don’t fill past the rim of the pan. Before disposing of the used pan and chips, pour in enough water to cover the chips and wait overnight to make sure nothing is burning. If some chips are still smoldering when the water is added, that’s OK. Just keep hands and face as far away as possible so you aren’t burned by steam.
There are additional safety measures that must be taken when using pots like these. First, do not allow young children to handle pots in any way. That includes lighting, extinguishing or replacing fuel. Use your best judgment with older children. Adult supervision should always be present. If your table is under a structure make sure flammable materials are not close. Curtains should be tied back, and it might be best not to have a cloth on the table. Though it’s smaller, the woodchip fire pot is pretty much a campfire. Sparks may be carried where you don’t want them, especially on a windy day. In areas that have suffered from drought, one spark may be all it takes to create a disaster. Be smart and make sure your fires are out before walking away from the pots.
Now that the serious stuff has been covered, do enjoy your pots. Make sure you eat your fair share of s’mores. I know I will.
The Project Queen