Wednesday, August 29, 2012

It Began with a Jar


I love thrift stores. They’re a great place to shop when looking for items or ideas for a project.
A few months ago, my older daughter and I visited a Goodwill near her apartment. She was looking for furniture, while I was eyeballing the glassware hoping to find some interesting storage containers. I wasn’t ready to move into my craft studio yet, but it’s never too early to look for accessories.
Lo and behold, I found a 4-piece set of blue glass canisters, complete with lids. I also found a large, blown glass jar (vase or hurricane, you decide). I liked it’s slightly off-kilter base and the bubbles in the glass. So I bought it too.
After I brought it home, I wasn’t quite sure what I wanted to do with it. I probably could have placed a pillar candle in it with colored decorator glass marbles, but I don’t do a lot of decorating with candles. As I continued to study it, I decided making it into a terrarium was just the thing.
The circumference of the jar wasn’t big enough for lots of plants, and I thought it was an interesting enough container that it should have one special plant, something that bloomed and was easy to care for. I decided to get an African Violet.
African Violets come in at least 4 different forms; miniature, semi-miniature, standard and trailing. Miniature would fit my container the best, but alas I wasn’t finding any locally. To the internet! Usually I find a lot of choices when looking for something, but not on this occasion. It didn’t matter, however. I found a nursery called The Violet Barn. They had exactly what I was looking for, and more. And that’s where I encountered a problem. I couldn’t choose just one plant. I ended up ordering 4 violets and 2 streptocarpus. The little plants were all so reasonably priced it would have been a crime not to buy more.
Now, I had some empty pots. I just didn’t want to put the other violets in pots. They needed their own glass containers, which meant another trip to the Goodwill. I did find 3 vases of various sizes. In the end I used 2 of them. One of the violets I ordered was semi-miniature and was going to need a larger vessel. After rummaging in a kitchen cabinet I found an 8” round canister whose lid went AWOL. It turned out to be a perfect fit. The outer leaves of that plant are almost touching the jar now.
African Violets are not a plant that enjoys being constantly wet. They also don’t care for a lot of water on the leaves. To provide drainage, I placed at least a ½” of aquarium gravel at the bottom of the containers. It’s natural gravel, no funky colored stuff. The next layer is charcoal, ¼” to ½” deep. The charcoal helps keep unpleasant odors away. Both can be purchased at a pet store. Buy the charcoal in a bulk container rather than prepackaged fish tank filters. Since violets are comfy with the same conditions most of us enjoy in our homes, they don’t need a terrarium container with a lid. I found the best way to water my little babies (and keep water marks off the glass) is to use a bulb baster that’s dedicated just to them. It also makes it easier to keep water off the leaves.
Terrariums are fun and easy projects. They may also be trendy again. I’ve seen ready-made ones at Lowes, but it’s just not as fun as creating one yourself. Get inventive with containers, create a miniature woodland scene with ceramic animals, or whatever you dream of.
The Project Queen
Note: In the interest of full disclosure, The Violet Barn has not paid to be mentioned here. They are a vendor with whom I have done repeat business and have no complaints with their service. My second order with them was a gift for 2 different people in 2 different states. I couldn’t find the gift shipping option in their ordering system. After I placed the order, I called them. They had no problem with splitting it. It did require some additional funds for shipping, but I expected that. I did mention briefly while on the phone that one of the plants was going to a relative who lost a loved one. When her package arrived it contained 2 plants. I’m not quite sure how that occurred. I can only conclude that there must be some very nice people at The Violet Barn.
 

Saturday, August 25, 2012

Stash Busting and Worthy Causes, Part II

I mentioned in my last post that another item was included with the jewelry I donated. It is a large presentation pouch (or envelope) I made out of Chinese silk brocade. As you can probably guess the materials came out of my stash. In fact, I had everything I needed to complete this project, so it was a great stash buster.
An 8 ½” x 11” piece of black illustration board was used to secure the jewelry and make it easy to display during the auction. To protect the jewelry during transport and enhance the total package, I needed something different than boxes. It’s at such times having a stash comes in handy. After looking through my brocades I decided on a light pink with plum blossoms. And wouldn’t you know, I had a fabric for the lining too.
The approximate finished size is 10” x 13” when the flap is folded down. The pieces were measured 11” x 26 ½” for the body of the pouch. To make the rounded flap at top I used a 10” dinner plate. At the furthest point the flap added 5 ½”. Both pieces of fabric were cut to be the same size. A half inch seam allowance was used. Before any sewing was done the rounded edges were clipped almost to the ½” allowance. Experienced sewers will know why the clipping is done. For those who don’t, it creates a roomy seam or smooth edge. The allowances on all sides were ironed down before the two pieces of fabric were put together. Prior to securing the pieces together, do a dry fit to make sure the edges match up. You may need to do some adjusting to the ironed allowances. Heat & Bond was used on the rounded flap edge to make sure the clipped fabric stayed flat. The liner was secured to the brocade with fusible web cut to the fabric size, minus the seams allowances. Fusible web looks like a light interfacing but it’s basically a sheet of glue that gets ironed between fabrics. It can be found on bolts or comes in a package.
Once the fabric cooled from ironing, I folded the body of the pouch so the bottom edge was just under the flap fold. The side edges were top-stitched together with a straight stitch a ¼” from the edge. A decorative stitch was used on the flap. Two different colored threads were on the machine for the flap. A dark gold matching the lining was used on the brocade side. Pink thread was on the bobbin and showed on the lining side. A single button hole was sewn at the end of the flap. The bottom of the button hole is about 1/2” from the edge. An iridescent glass button secures the pouch.
Overall, it’s a project easily done in a few hours. And it’s great for smaller amounts of fabric. So don’t throw your leftovers away. The size could easily be adjusted to the item it will contain. The flap can be pointed, or if you’re feeling really fancy, scalloped or given an edging such as lace. Have fun with the fastners too. I could have used a frog fastner with the Chinese brocade. Sadly, the ones in my trim collection were the wrong color.
An interesting note about the brocades in my collection. I bought them several years ago on Ebay. The seller was from China and I really agonized about placing a bid. At the time Chinese brocades could only be found at a high-end fabric store in my area, and it was expensive, well over $10 a yard. The Ebay seller had a large selection of patterns and many colors, including a cobalt blue fabric with silver pagodas on it. I couldn’t resist it. It was a six yard piece at a very fair price. After I took the plunge I waited anxiously for my prize to arrive. It had to go through customs so it took a couple of weeks. Imagine my surprise when the package arrived. The box was half the size of a shoebox. To say I was disappointed would be an understatement. There was no way six yards of fabric were in that dinky box. Turned out I was wrong. To this day I still don’t know the seller got it all in the box. (Ancient Chinese secret?) In the end, I must have been pleased with my purchase. I went back to that seller several times.
PS – before you get mad at me for “Ancient Chinese secret” it was the catch phrase from a 1970s commercial for a Calgon laundry product. I was a child at the time so don’t ask me why I still remember it. I guess I found it amusing, and it can be a handy quip when someone wants information you don’t wish to divulge. (Secret ingredients, etc.)
The Project Queen

Thursday, August 23, 2012

Stash Busting and Worthy Causes


When you have been creating projects for more than 20 years, you tend to accumulate a few things. I spent some of the summer trying to move supplies into my new studio. (Former bedroom of my older daughter. My original work space was invaded, but that’s a story for another occasion.) I still don’t have everything relocated so it may be time to downsize the supplies again. My dream when I started the relocation program was a room that was clean, uncluttered and decorated the way I like it. (Girly, in other words.) When I ran out of the storage space I allotted for stuff I realized it was time to take some action.
Fortunately, my husband and I volunteered to be on a committee for Ducks Unlimited Northwest Prairie Chapter’s annual banquet. Since DU is a non-profit group, donations for the evening’s auctions and raffles make a big difference in the amount of money raised for the organization. Guns, art prints of ducks and Labrador Retrievers, hunting clothing, etc. are all fine things. Many of the ladies attending like those items as well as men. But sometimes a bit of sparkle is appreciated too. There certainly isn’t a better time to remind the hubby that he owes you something for all those mornings he disturbed the household at 2 a.m. while preparing to go duck hunting.
During one of our meetings a request to find more donations was made. Cue my stash. I remembered I had some fresh water pearls and wire-encased crystal beads.  I originally intended to make a bracelet with these items. After I located them, I realized I had enough of the pearls to make a set. Especially if I added some crystal beads in between. Of course, that meant a shopping trip. I found the desired beads, along with the necklace pendant and some dragon balls. They were just the items needed to take the design to another level.
Construction was straight-forward. No fancy bead-weaving. The beads were strung on silver metal wire and secured with matching crimps. I used lobster claw fasteners on the necklace and bracelet because they are more secure. The pendant is a little over an inch across and heavy. It was necessary to make everything sturdy. The most involved part of construction was keeping track of bead count and maintaining the pattern established for the pearls.
The committee members decided to place the set in the live auction, which was definitely an honor I hadn’t been expecting. It was fun to watch the bidding. The set sold for a very respectable amount, and I thank the winning bidder from the bottom of my heart. I hope she receives many years of enjoyment from my small contribution.
There is a second part to the set. If you would like to see what it is and how I made it, please come back for another visit.

The Project Queen


Monday, August 20, 2012

A Royal Greeting


Hello! Welcome to my new blog. I had considered starting this with some kind of grand introduction to you, my royal subjects, but I’m really not that full of myself. And it just seemed cheeky.
Instead, I would like to think of any who come to visit as friends and potential collaborators. As you can probably see from my blog title, I’m one of those people who enjoy producing something, usually creative. Normally, my projects are solitary pursuits and mostly done for my pleasure. But my habit of making things does seem to please others when they receive something from me. That is my ultimate goal here.
What kind of projects will you find? Probably more than most people would consider normal. I’m obsessed with making things. Drawing was my first love. I remember drawing lots of horses starting around age four. Wildlife and a variety of mediums entered my artwork by high school. Along the way I also started learning various crafts; crocheting, sewing, knitting, embroidery, cross-stitch, needlepoint, some beading… If it has any creative possibilities I may have tried it or dreamed of trying it. My taste can kindly be described as eclectic. As time progresses, various examples will be submitted here for your viewing pleasure.
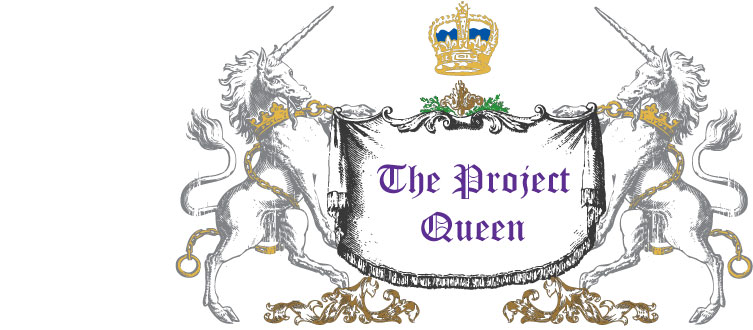
The first project I’m sharing with you is the design at the top of this page. I worked as a graphic designer for 12 years, so of course I couldn’t settle for just text as my blog title. Being the Project Queen, I just had to embellish. It is probably best classified as a coat-of-arms, also known as heraldry. For those who haven’t studied such subjects, the various elements of heraldry have specific meanings. I gave careful thought to the kinds of things I wish to share here, and the type of experiences I hope you, dear reader, have while visiting.
The symbols
Unicorn – extreme courage (Doing a blog is a big deal for me. I’m not usually social.)
Crown – that’s probably obvious
Banner – a personal choice. (A lot of my projects involve textiles or fiber.)
Some of the elements, such as the acanthus decorations at bottom were added to introduce certain colors. And the unicorns needed a footrest.
The colors
Purple – royalty
Blue – loyalty and truth
Tawny – worthy ambition
Silver – peace and sincerity
Green – hope, joy, and loyalty in love
Gold – generosity
Credit where due
When I started this design, I was looking for elements already made to speed up the process. The following sources kindly shared parts of this design for free on the internet:
MrTentacleGuy.deviantart.com, ARS GRAFIK, and Enigma Designs. Thanks to their submissions I was able to put together an image that pleases me a great deal. Adding color made it even better. However, it wasn’t a quick process. It took me an entire morning. I’m not going into much detail concerning how I did it, except to say it involved a lot of drawing in Adobe Illustrator.

A look to the future…
I work for a school district and summer break is coming to an end. (Boo-hoo! Sucks for me. ) Some of my upcoming blogs will be about what I made during the break. I actually started back to work today so I’m not sure yet if I will have time to post every day, but this week’s submissions will include an item I made and donated to a charitable event that occurred Saturday, August 18.

I thank you for spending a little time here today, and look forward to future visits.

The Project Queen