Saturday, December 19, 2015

Sweet Potato Apple Caramel Rolls

I do like basic cinnamon rolls with cream cheese frosting or icing. They are a classic after all. But my heart belongs to gooey caramel rolls. When I make them I like to use the sweet potato dough recipe found in the following link. It not only has a pretty color, but the addition of the sweet potato makes great camouflage for whole grain flour. (In case you have some picky eaters. My husband is fine with whole grain baking, but this is the only way I can get him to eat sweet potatoes without complaining.) This particular version also combines a few favorite fall/winter ingredients, and while they are great for breakfast or brunch, don’t be afraid to make them for other meals or special occasions. I’m a firm believer in changing things up a bit. Why not have caramel rolls for dessert after a holiday meal? Or make mini versions to serve at parties or buffets?

The author of this recipe included photos, in case you would like visual assistance.

Depending on your bread making experience, you may want to try the original recipe a few times as written before making changes to it. Get acquainted with its look and feel. Ready to change some of the flour to whole grain? Do the following. When I use whole wheat, the sweet potato and liquids get blended first. Even though I use instant yeast for my bread baking, I like to soften it in the liquid for this recipe, before adding any flour. Then the whole wheat flour is stirred in. Since I’m doing a mostly ½ & ½ whole wheat to white ratio, I use 2 cups. Let the mixture sit until it becomes bubbly. This technique is called making a sponge. Because of the bran in whole grain flour, it’s a beneficial step. It will soften the bran and jump start liquid absorption in the flour itself. Whole grain flours generally require a higher ratio of liquid, so you may find that a smaller amount of white flour is needed while mixing and kneading the final product. Instead of 2 full cups, you may only need 1 ½ c. When whole grain is added, keep your dough softer and stickier to the touch. It results in bread with a tender interior.

This is a recipe you can stretch out over a couple of days. One of the best features of instant yeast is its tolerance to a wide range of temperatures, from freezer storage to 120°F. I usually make my bread dough with room temp. liquids, then let it rise slowly in the refrigerator at least overnight. (Unbaked dough can be refrigerated up to 4 days.) Depending on your schedule, you can make dough one day, shape the rolls the next, and bake on a third day. But if you’re going to stretch the process out, do your best to keep the dough cool while shaping the rolls. Instant yeast is highly active, and as your dough warms up it will start to rise, which can make rolling it with the filling a bit tricky. Before baking, warm the rolls to room temp. for at least an hour.

Is your dough ready? Let’s make some caramel rolls.


Before beginning prep of your rolls, ready your 9.5" x 11" baking pan.
The following ingredients will make the caramel while rolls bake.
Up to 1/4 c. melted unsalted butter, 1/4 c. boiled apple cider, 1/4 c. cane syrup (such as Steen's),
and nuts of your choice (optional). I used pecan pieces.
For those not familiar with it, boiled apple cider is a syrup made of reduced apple cider.
It's tart, and if you want to increase the zing just use 1/2 c. of it, no cane syrup.
It can be found in some specialty markets, but I order it from King Arthur Flour.
Don't let the price scare you. A little goes a long way. I've had my bottle more than a year.


Let the kneaded dough have it's first rise in a greased bowl covered with plastic wrap.
If you want make your rolls in 2 days, let the dough rise until double in a warm place after kneading.
Then roll the dough into a rectangle 1/4" thick. Remember, this dough is a bit sticky.
You will need additional flour to keep your fingers and rolling pin from wearing it.
Instead of sprinkling flour on my work surface, I cheat and place my dough in the flour container.
After it's coated, it goes to the mat.
Please note this trick may not work well if you have a tall, round flour canister
with a narrower opening.
I keep my flour in large, rectangular Rubbermaid containers that can hold up to 10 lbs. of flour.


Spread the dough with 1/4" c. soft butter.


Cover the butter with brown sugar and cinnamon. No, I don't measure the amounts.
Just don't be too stingy.


Sprinkle one diced apple, dried cranberries and currents on top.
Several varieties of crisp, tart apples are suitable, so use your favorite.
Since the apple is cut into very small pieces, don't bother peeling it.
It can also be prepped while the dough is rising. Coat with lemon juice to prevent browning.


Start on a short side and roll in the long direction. You want lot's of layers.
A bench scraper is a handy tool for assisting the process when working with soft dough.


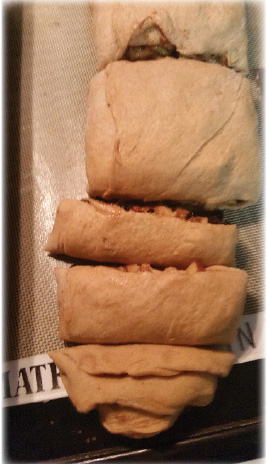
All rolled up &  ready to cut.


To make one dozen rolls, start by cutting in half.


Cut the halves in half, then into thirds.


 Place the rolls into your prepared pan.


Cover with plastic wrap to prevent drying out while rising.


If you're doing an over-night rise in the refrigerator, using the lid of your pan on isn't going to hurt.
But it's OK if you don't have one.


The next morning the rolls have risen and are ready for the oven.
While they're warming to room-temp, heat your oven to 350 degrees.
Bake for 25-30 minutes. The rolls should be golden-brown on top.
After removing from the oven, allow to cool for up to half an hour.
It's gives the bread a bit of time to set further, and you don't want anyone
to burn their mouth with hot sugar.


Caramel rolls are served just like an upside down cake.
Remove from the pan and flip over so the caramel side is on top when serving.

 A brief note about The Fresh Loaf: It’s a bread bakers’ forum for avid amateurs and often visited by some well known professionals, too. I’ve read some contributions from Peter Reinhart. If you want to expand your bread baking repertoire this is the place to do it. I highly recommend you purchase a good quality digital kitchen scale that has more than one mode, including metric. Recipes found at The Fresh Loaf are contributed from all over the world, and most from outside the US are written in metric weights. A scale will open up your bread making opportunities dramatically. Scales that include volume measurements can also improve accuracy for any baking recipe found in the US. You won’t have to wonder if you over- or under-filled your measuring cups. Be sure to get a scale with a tare function. You can place your mixing bowl on it and zero out after each ingredient added. No need to break out the measuring utensils. Yeah! Fewer dishes to wash. Sounds like a win-win to me.

The Project Queen

Sunday, October 25, 2015


This post is inspired by a comment my husband made. He thinks my EA doe, Lola Rapunzel, looks like the Were Rabbit. She climbs the sides of the cage when it's feeding time or just wants attention. I tried for a month to get a better photo of her doing this. Unfortunately, it was like trying to photograph a sasquatch.
If you stand in front of her with a camera, she just sits and stares at you, wondering why she hasn't been fed yet.


I don't know. There might be a slight resemblance...
What do you think?


This pic was taken 2 days ago, during a grooming session. Lola is now 10 months old. I didn't think it would be possible, but her hair is even thicker and longer than my other EA, Angus. Though they are both pedigreed purebreds, it's definite proof that the "utility" chosen by a breeder makes a difference in characteristics. Angus was bred and raised by a family who focused on fiber production. He molts his coat 4 times a year, which is just enough time for it to reach 3-4 inches staple length. Though she sheds some, Lola doesn't blow her coat quarterly. She has a show rabbit pedigree. Since I kept her hair short during the summer, I don't yet know the maximum staple length of her hair.


Lola with her ears up. The long hair hanging over her face is from her ears. She does have all the face furnishings typical of the English Angora breed, but I had to trim her "bangs" and lower the cheek furnishings to minimize the amount of hair getting in her eyes. Too much irritation can cause eye infections, and since Lola's white nose disqualifies her from showing, it's no hardship to trim up her face a bit. 

She's still stinkin' cute.

The Project Queen

Monday, July 6, 2015

Dry Shampoo, Part Deux


Oh, our poor hair. While it’s been called a woman’s crowning glory for at least a few decades (perhaps even a couple centuries), most of us have a love/hate relationship with our hair. Mostly hate. When one has fine, straight hair like mine, it can be really hard to find the love.
One would think, when you live in a humid environment like I do, my hair type would be tame and slick. Au contraire! It frizzes and does almost as much crazy stuff suffered by those blessed with curly hair. So, I’ve been observing the rising interest in the “No Poo” movement for a while. I finally found the courage to try it almost 2 months ago. (Those who have tried it claim eliminating shampoo makes your hair thicker and reduces frizz.)

For those thinking of doing the same, here’s something to consider. You don’t have to go cold turkey. For several years, I had already ceased washing my hair every day. Maybe it was just laziness, but when you have to be out the door before 7 AM, it’s nice to have some mornings when your routine is more relaxed. There is also an upside if you decide to go “No Poo”. Since your hair is already used to not being washed every day, you can start stretching out the number of days between washing. It may take a bit longer to go “Poo” free, but some might find it a less dramatic way to make the change.

So, how does “dry shampoo” fit into the “No Poo” movement? If you’ve visited this blog in the past you may have seen a previous post for dry shampoo. I have since changed the formulation a bit, and it’s no longer necessary to use any kitchen appliances to make it. Products like oat flour are now easy to find in the suburban grocery stores where I shop. The version I’ve used on my rabbits works very well to clean out “wet” messes they occasionally get in their long hair. I thought it might be useful to help me keep my resolve to eliminate suds from my hair. There was also another motivation for trying it. Some of our travel plans for our Airstream include staying in remote places for some solitude and stargazing. Even with an RV, when you do that kind of camping, you only have the resources you bring with you. Water is the most important and squandering it isn’t an option. You might say I’ve been field testing. I figured if I could use the dry shampoo and go about in public with confidence, then the testing was a success.

There is no hard and fast formula for making your own dry shampoo. After trying the bunny version, I decided oat flour didn’t need to be in mine. It contains 3-4 tbsps. of starch to 1 tbsp. of baking soda. When I make a batch, I use what is available in my pantry at the moment. The bulk of the formula is mostly corn starch. It’s easy to find and inexpensive, but if you prefer to keep your body care gluten or grain-free; tapioca, potato and arrowroot are good alternatives. Cosmetic clays such Kaolin or Moroccan may good options too. I just don’t have any in my arsenal and haven’t tried them. You will want to choose powders with a really fine texture which will not only absorb excess oil but will also “disappear” into your hair. However, if you have the habit of running your fingers through your hair, you will feel the powder. Luckily, I discovered an unexpected upside. Besides minimizing the oily appearance of my hair, the dry shampoo actually adds some volume. Not “Texas Big Hair” volume, but I’ll take what I can get.

This is another opportunity for therapeutic and aromatherapy crafting. Customize to your heart’s content. I use a few drops each of Lavender, Clary Sage, Ylang Ylang, Rosemary and Sandalwood. All these oils are considered beneficial for hair growth and renewal. They are also believed to be antimicrobial and help reduce oily secretions. These oils are suitable for other skin/hair types as well. Besides its therapeutic properties, there is another reason to add an oil like Sandalwood. It’s known as a fixative in perfumery, which is a role played by many oils derived from wood resins. Just because you’re giving up a commercial product doesn’t mean you have to give up the sensory delight of fragrance, or the perception of being “clean”. Please remember, though, what works for one person may not work for you. Do your research and test new things carefully before incorporating them into your routine. I have fragrance sensitivities, especially in commercial products where you often don’t know if the source is synthetic or natural. That being said, as much as I love Sandalwood and the fragrance longevity it adds to my body care projects, it is used in very small doses. Usually just a drop or two is enough. Any more than that and it makes me sneeze. Of course, making something like dry shampoo in small amounts allows you to experiment more frequently until you find your ideal formula. (And sometimes variety is the spice of life.)

To make your shampoo, you will need a small air-tight container. Some stirring may be necessary if essential oils are added. They will clump in the starch. Bamboo skewers are handy for breaking the clumps up. Finish blending by placing the lid on the container and shaking vigorously for a minute or two. For actual use, you can store in the airtight container, a salt/pepper shaker, or repurposed spice bottle with shaker holes in the lid.

The main goal when applying your dry shampoo is to work it into the hair close to the scalp, but it’s light enough you can rub all the way down to the ends. Use small amounts. You may not need very much, and it will help minimize waste. You also want to “dry shampoo” your hair where it’s easy to clean up. I usually lean over the bath tub. If you use it after bathing, let your hair mostly dry. Otherwise, dry shampoo can be handy for freshening up on those “between” days. After working into your hair, restore order with a comb or brush that’s easy to keep clean. I would recommend getting dressed afterward. Excess powder will be on the back of your neck and shoulders.

Going “Poo” free also means having a replacement for soap when bathing. The following link is for a blog post from Piping Rock. In the interest of full disclosure, I’ve purchased many of my essential oils and other aromatherapy products from them.


I like using baking soda instead of shampoo, but the vinegar rinse isn’t my favorite. Since I’m a brunette, I prefer black tea. Instant works great for this, and you can add a few drops of essential oil to it. Herbal rinses such as chamomile for blondes, or calendula for red heads can also be used. When doing “No Poo” research, be cautious with any recommendation for citrus juice or essential oils. Citrus can cause photosensitivity, resulting in skin irritation if you spend time in the sun after using it topically.
Summer is in full swing now, with its more relaxed attitude. Definitely a good time to eliminate shampoo from your routine. By the time winter rolls around again, your hair and scalp should be naturally conditioned, making it much better behaved when the weather gets harsh. (That’s my hope. Static made me absolutely crazy this past winter.)
Wishing you good hair days.


The Project Queen

Part Trois: After 2 weeks, I decided I didn't care for baking soda in my hair care routine. I didn't start with it initially, but added a rinse after having to do yard work in 90+ degree temps with 100% humidity. I felt it made my hair smell stale, not to mention too dry and static. Too dry can lead to breakage, something you definitely don't want when you have fine hair. The biggest reason I initially included a small amount of soda in my dry shampoo was to minimize clumping, since it is a bit coarser than starch. But the reasons it's in the dry shampoo I make for my rabbits has nothing to do with my hair. Clumping just isn't that big a deal, so the baking soda was eliminated from that too. I have been using commercial shampoo once or twice a week, and there are products with a smaller amount of ingredients and no sulphites. Even if a product has "organic" on the label, read the ingredients carefully. If you're finding substances that aren't clearly identified or recognizable to you, don't buy the product. I still use my dry shampoo once or twice a week, usually to stretch out days between shampooing with the store-bought stuff. It also comes in handy when you're traveling with an RV restoration project which isn't finished, and conclude the campground facilities don't meet your standards. (A post covering that adventure will appear on the Stellar Land Yacht, a blog I share with my husband.)


Wednesday, April 1, 2015

Crazy Bunny Lady


There are those individuals who have an affinity for felines, and though I like the kitties, my weakness is for extra-furry rabbits. (With one exception. More about Benjamin in a moment.)

I now have 4 rabbits, the most recent purchased about a month ago. Her name is Lola Rapunzel. She’s an English Angora, like Angus, and is 3 months old. The above photo was taken two weeks ago. Since then her coat has grown out considerably. I need to measure it, but I’m guessing it’s at least 4 inches long. I started brushing Lola within a week of bringing her home. She gets brushed 2 times a week right now. (Baby coats are extra fine. They can’t be neglected.) I’ve been agonizing over whether I should shear her soon since she seems to be getting a bit warm, but her voracious appetite hasn’t waned. Right now, I’m in the process of finishing a shearing of Angus and will need to let my hands recover for a few days. Since she’s still a little too young and susceptible to chilling, Lola’s first haircut will be a trim of her tummy and the inside of her back legs. Hopefully, that will help cool her down a bit for now.  At the end of May I will probably do a full body shear. While Lola hasn’t been terrible, she’s a bit squirrelly on the grooming table. In two more months, she’ll almost be an adult and should have a more zen attitude.

This is what Lola looks like now. As her hair has grown, she's gone from redhead
to strawberry blond.
Her color is Vienna Marked Tort.

Besides the grooming, Angora kits are high maintenance in other ways. Lola is actually the second rabbit kit to join our household, but she and Benjamin are miles apart in their juvenile needs. (Benjamin is about a year old now, an adult bunny.) Of all my rabbits, it seems like I’m always feeding Lola. It takes a lot of nutrition to grow physically while producing a full wool coat at the same time, and Angora rabbits have very particular dietary needs. Then there is the housekeeping. I clean all my bunny cages and litter boxes every day, a necessary chore when rabbits are in the house, and an important part of health management. The adult rabbits do their bodily functions almost as much as Lola does, but they keep their messes confined to one favorite corner in their cages (for the most part). Lola will eventually do the same as she settles into maturity. Right now she uses two litter boxes and messes in the bottom of her cage. I use (2) 2-story Ferret Nation cages because I love the large double doors that open up the entire front. But it’s a set up that requires making your own wire cage bottom to keep a bunny clean. Lola and Benjamin each have one made of PVC trim and ½” square hardware cloth. (Benjamin refused to be litter-trained.)

Is there anything cuter than a bunny in a box?

I will say it’s no hardship to spend any time with Lola. After a day or two, she became comfortable with her new home and has been very engaging ever since. In addition to being quite affectionate, she has the energy of youth. It’s amusing to watch her do binkies and run pell-mell through the cat tunnels in the exercise pen.

Cute as they are though, I must warn against getting a kit as your first-ever rabbit, especially English Angoras since their grooming needs are the most challenging. Rabbits have fragile bones, especially as developing kits. They don’t tolerate rough handling, and their prey animal instinct means they don’t like being picked up & held. Just because they’re vegan doesn’t mean they’re defenseless. They can bite hard enough to draw blood, and will often scratch with their toenails when trying to escape. Just like other animals, rabbits have their own behaviors and forms of communication.  It’s necessary to learn how to communicate, or you will never earn your bunny’s trust and cooperation. Novices should really consider getting an adult bunny, especially if they want something high maintenance, like an Angora. Mature rabbits who have been handled correctly are usually easier to make friends with. Adult rabbits will also be more tolerant while you’re trying to learn the requirements for good bunny husbandry. It goes without saying you will make mistakes, especially while trying to learn how to groom an Angora’s incredible coat. Even adults will not always cooperate when you need to groom their vulnerable undersides. Again, it goes against instinct. Angus, my 5 yr. old EA, often tries to escape when I lay him on his back. He’s bitten me on the thigh a few times to express his displeasure, when he thinks I’ve kept him upside down too long. You won’t want to struggle with a juvenile you’re afraid of injuring.

It's a bit difficult to tell in this photo, but Benjamin does have long hair
on his neck and between his ears.
Otherwise his hair is short, and he's the only one who who enjoys a box of shredded paper
since he doesn't take it with him when he jumps out.

Now, about Benjamin… Last year, it was my intention to make a plea against purchasing “Easter” bunnies only once (no good deed goes unpunished). But I have to make it again because of Benjamin. I made the choice and planned ahead to bring to bring my other bunnies home, but Benjamin was an Easter bunny whose forever home ended up being with me. Unlike Mr. Harry Buns, my shelter bunny who was found while trying to survive on his own, Benjamin’s situation wasn’t dire. Though he was spray painted pink and blue with temporary hair dye. He was given to the young children of my veterinarian. She owns the clinic and works 12 hr. days most of the week. The gift givers failed to consult her before gifting her children with the bunny. Instead of being a delightful, planned addition to their family, he was an unexpected burden. A couple of weeks later, when I brought Angus for his annual, I found myself coming home with another rabbit. Now, I was fore-warned by my older daughter, who works for the good doctor. But at the time I was in the process of looking for another Angora, so I hoped someone else would help out. The sudden addition of Benjamin forced me to purchase another cage much sooner than I had planned, and his refusal to use the litter box presented challenges to keeping him clean. On the upside, he has his own distinct and charming personality. And in my veterinarian’s defense, she didn’t force me to take him, but I was her first choice because I have experience with long-haired rabbits. She gave Angus a free exam and neutered Benjamin without charging me as a way of saying thank you. The moral of the story? If the child isn’t yours, don’t ever give a pet of any kind without consulting parents first.

Being an animal lover, it makes me sad to see society’s general lack of responsibility toward their fellow creatures. Cats and dogs get a lot of press, but many kinds of animals are surrendered or rescued, such as rabbits and horses. (If they don’t die shortly after the holiday, many rabbits end up in shelters.) Three of our five dogs are adoptions, and half of my rabbits were unwanted early in their lives. In honor of the Creator’s resurrection, it is my hope humankind will eventually learn to value the lives of the creatures He gifted us to enrich ours.

The Project Queen

Mr. Harry Buns, my first bunny.
Considering he spent the first 2-3 months of his life trying to survive,
then another 2 months in a shelter, he's tamed considerably.
However, he is the one most likely to bite, especially in his cage.
Part of the biting problem is due to the long hair around his eyes.
He can't always see a hand reaching to pet his head and doesn't like being startled.
Otherwise I think it's because he's extra protective of his safe place,
something he hasn't always possessed.

Angus half way thru shearing might not be the most charming, 
though the hairy hula skirt is rather funny.
Because my hands are giving me problems right now, it can take me more than a week to finish.
Since he's picked up the naughty habit of chewing on his hair when he gets hot,
he's either going to be retired from wool production or reduced to one harvest grown
from late Fall to Spring.
Retirement means I will have to trim his hair down every month to a month and half.
To manage the task I will be purchasing a pair of clippers specially designed for Angora Rabbits.
The base price for just the clippers is about $300.
(The same clippers will be used to shear Lola, too.)

Here’s an update on the clippers. We have an Oster A5 Turbo clipper body purchased several years ago for a Cocker Spaniel we owned. The clippers still work great, so I just purchased a #40 blade after doing some research. It’s the blade recommended most frequently by other rabbit owners who don’t own the German-made Aesculap clippers. Oster recommends the #7 skip-tooth blade for extra fine hair, but more space between the teeth means a greater chance of nicking a rabbit’s extra-tender, stretchy skin. To manage hair removal with a fine-toothed blade like the 40, keep a stiff-bristled cleaning brush in reach. Brush hair from the blades as soon they show signs of not cutting properly. Lube the blade after each cleaning and take it apart after each grooming session. Completely removing the hair from between the plates will help improve their longevity considerably. The original #10 that came with our clippers was used on our Cocker for more than 8 yrs. Some also recommend having extra blades for switching when they get too hot. I’m comfortable with scissors so will switch to those when the blade gets warm. My original scissors were getting too dull and just wouldn’t sharpen any more. I purchased a new pair designed for fine, silky hair and trimming around areas like ears. It’s just a personal preference to use smaller scissors on animals that weigh less than 7 lbs., especially when I’m trimming inside legs and on the tummy.


Wednesday, February 11, 2015

Red Hot Lover’s Cupcakes


Ah, chocolate, the most ubiquitous gift given for Valentine’s Day. I do enjoy it myself, but perhaps it’s time to kick chocolate to the curb and spice this holiday up a bit. With red hot cinnamon candies.

Why cinnamon? It started with the discovery that there were some left-over red hot candies in my cupboard, after my younger daughter made hot drink mixes for friends during the Christmas break. They are not something normally eaten very quickly around here, so I started thinking about what I could make with them.

Cinnamon lovers might use red hots for decorating baked goods, but I wanted to go a bit farther, by incorporating them into a treat. I suppose cookies would be a good option, especially the sugar variety. They are probably the best option if you want to leave the candies whole. However, for some reason, cookies didn’t occur to me. White cupcakes with cream cheese frosting seemed the perfect starting point for a cinnamon experiment.

The cupcakes pictured here are from the second batch, made for my older daughter’s co-workers. The first batch I made, while delicious, needed a tweak. The frosting turned out great. Half a cup of cinnamon candies pulverized to powder in the blender was enough for the intense pink color and plenty of cinnamon flavor. The candy powder replaced half a cup of powdered sugar. The white cupcakes were another matter. There was nothing wrong with the batter itself, but it can’t support hard candies, even small ones, while baking. I left them whole, hoping for a white and red polka dot effect, along with crunchy bits of hot cinnamon. Most of the candies sank to the bottom. Of course, they melted and stuck to the muffin papers, making it a bit difficult to free the cupcakes from their wrappers. I suppose coating the candies in flour might keep them from sinking, but the hard, shiny shells would need to be wet for the flour to adhere. Seems that would become a sticky mess before they make it into the batter. Another possibility would be to sprinkle on top of the cakes before baking and hope they stop sinking before the batter sets. For my second batch, I opted to make pink cakes by pulverizing more of the candy and replacing the some of the sugar with it.

To give credit where due, the recipes I played with came from one of BH&G pink checkerboard cookbooks. (I believe it’s a 2008 copy.) Part of the reason I chose the white cake recipe was its use of egg whites. I had a container of them in my refrigerator which needed to be used. Four egg whites are about the equivalent of ½ c. in case you have the same problem I did. (Didn’t remember how many yolks I used.)

Before measuring the candy for your cupcakes, pulverize into a powder first. Get 2 packages and grind one. You will need 1 cup total of candy “sugar”. Grind just enough to give you that amount. It is OK if there are small pieces. Then you can still get a speckled effect in the cake and frosting.  Any leftover candies can be used to decorate the finished cupcakes. Look for red hots in the candy isle. (Brachs Cinnamon Imperials) They may be cheaper there, than the bottled ones sold in the baking isle for decorating (Cinnamon drops). Check the unit price on the bottom of the grocer’s shelf label. It’s the best way to compare prices. In case you don’t find them right away, check the top shelf. That’s where my grocery store hides them in the candy isle.

Cake
½ c. Butter
1 c. Sugar
½.c Cinnamon Candy “Sugar”
1 tsp. Vanilla
4 Egg Whites
1 tsp. Baking Powder
½ tsp. Baking Soda
½ tsp. Salt
2 c. All-Purpose Flour
1 1/3 c. Buttermilk
Note: I prefer one-bowl baking, so I cheat and mix leaveners and salt into the wet ingredients before adding flour.
Preheat oven to 350°F & prepare your muffin pan (12 cups). Use a large mixing bowl to beat butter 30 seconds. Add sugars and vanilla. Manipulate your mixer without power to start blending the butter & sugars. (Or use lowest setting on a stand mixer.) Otherwise you might get a nose full of cinnamon. Once at least half of the sugar is worked into the butter, it’s safe to use power. Incorporate egg whites one at a time, beating well after each. Mix in baking powder, soda and salt. Alternately, stir in flour and buttermilk. Divide batter into prepared pan(s). When filled about 2/3, yield should be 21 cupcakes. Bake 20-25 minutes. Check center cakes with a toothpick. If it’s clean, remove them from the oven. Allow to cool at least 10 minutes in the pan, then remove and cool completely before frosting.
Cream Cheese Frosting
1 (8) oz. pkg. Soft Cream Cheese
½ c. Softened Butter
1 tsp. Vanilla
½ c. Cinnamon Candy “Sugar”
5 c. Powdered Sugar
Beat cream cheese, butter and vanilla until light and fluffy. Gradually add sugars until the frosting reaches the consistency you desire. If it becomes too stiff, add milk a little at a time.

Happy Valentine’s Day!
The Project Queen